How to light a fire in your wood burning stove
A step by step guide to the lighting process.
Lighting a wood burning stove might seem straightforward, but doing it right is an art that can make a world of difference. A properly lit fire doesn’t just crackle with cosy charm—it burns hotter, wastes less fuel, and keeps your stove running efficiently. Mastering the technique also ensures you’re making the most of your wood, saving money and being kinder to the environment.
But let’s be honest—it’s not just about efficiency. Whether you’re at home or in a holiday let, there’s a certain satisfaction (and a dash of style) in effortlessly creating a roaring fire. Impress your friends, family, or holiday guests by proving you’ve got the know-how to turn a pile of kiln dried logs into the centrepiece of a warm, inviting room.
In this guide, we’ll take you through the steps to light a modern wood burning stove with air flow control—the most common type of stove found in UK homes and holiday lets. Follow these steps, and you’ll be a pro in no time.

Step 1 – Gather your Wood, Kindling and Firelighters
Before you start the fire in your wood burner, preparation is key. Having everything you need to hand will make the process smoother and ensure your fire gets off to the best possible start. Here’s what you’ll need:
Dry Kindling
Use natural kindling, such as small sticks or split pieces of wood, to build the foundation of your fire. Dry kindling lights quickly and burns hot, making it perfect for getting your fire started.
Natural Firelighters
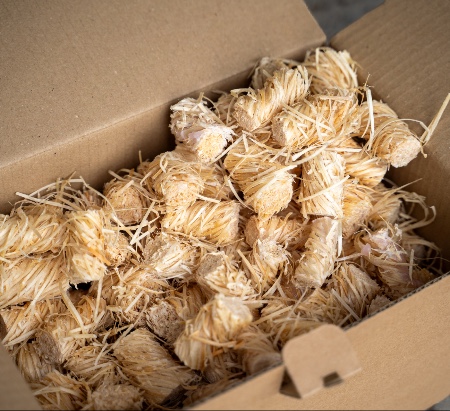
These are incredibly handy for lighting the fire with minimal fuss. Firelighters are made of wood wool and coated in paraffin wax so they always light very easily and keep burning while your kindling takes. If you don’t have firelighters, you can use alternatives like newspaper, bark, or anything else that catches fire easily when touched by a match.
Two Small ‘Starter’ Logs
Have two of the smallest logs you can find to hand. We’ll use these in the early stages of the fire while it’s getting going and the temperature is still rising.
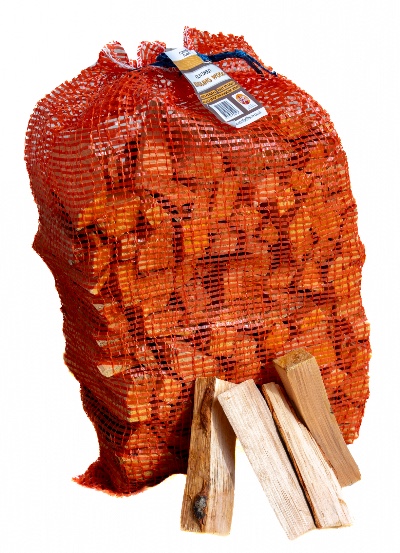
Make sure they’re kiln dried because wet wood simply will not light at a low temperature in the first few minutes of your fire. You should always use kiln dried firewood because it burns hotter and cleaner, ensuring a strong and efficient fire.
Kiln Dried Firewood
Keep a good supply nearby. Once the fire is lit, you’ll need to feed it with logs to maintain the burn. Store the wood indoors in a basket, ready to use, so you’re not fumbling in the cold.
Matches
A box of Swan Vesta or Cooks matches are fine. You can also use a lighter.
Fire Poker
Most wood burning stoves have a fire poker to hand. These are really useful for making adjustments to your fire during the light process. You often want to move logs around inside the fire to put them in the best position for burning.
Step 2 – Build your Fire in a Clean Wood Stove
Before building your fire, it’s essential to prepare your wood stove. Start by ensuring the ash pan is clear of ash and debris from previous fires, and check that the airflow mechanisms are free from obstructions. If you’re unsure, refer to the manufacturer’s instructions for guidance. Once the fire is lit, it will be far too hot to fix any issues, so it’s vital to get this step right beforehand.
Now, let’s build the fire. The goal is to create a kindling stack that allows plenty of air circulation. This ensures your fire has the three key ingredients it needs to burn: air, fuel, and heat. Here are two popular methods to arrange your pieces of kindling:
The Kindling Tower
1. Arrange your pieces of kindling in a square shape, stacking them with small gaps between each piece to allow air to flow.
2. Place your firelighters in the centre of the stack.
3. Continue stacking about four layers high, ensuring each layer is slightly smaller than the one below for stability.

The Kindling Tripod
1. Lay three or more pieces of kindling in a tripod formation around the firelighters.
2. Angle them so they lean towards each other, creating a teepee-like structure.
3. Ensure the gaps between the kindling are large enough to allow air to circulate effectively.

No matter which method you choose, double-check that your fire is built compactly enough to completely close the stove door before you light it. This is a critical safety tip, as an open door can cause the fire to burn uncontrollably or smoke to fill the room.
How Many Firelighters Do I Need?
Approximately three.
Step 3 – Lighting The Fire
Next stop – flames!
Now that your log burner is prepared and the fire bed is perfectly made, it’s time to strike a match and bring the fire to life.
Start by holding the match to the firelighters. They’ll ignite quickly, creating a flame that will catch the kindling. Why do we use kindling? The secret is in its size—small pieces of wood have a large surface area, making them ideal for catching the flame and building the heat necessary for a successful fire.
As the kindling burns, it generates heat while allowing plenty of airflow to circulate in the combustion chamber. This combination of heat and air is key to sustaining the fire.
Why Kindling Works
Surface area: Small, split wood catches the naked flame easily.
Low moisture: Kindling, with its small size and high surface area, dries out more effectively than larger logs. Less moisture means better combustion, and moisture is the enemy of lighting a fire.
Air Control is Key
Ensure your air vents are fully open during this stage. The increased airflow feeds oxygen to the fire, helping it grow. If necessary, you can even leave the door slightly open as the fire takes hold. This promotes maximum airflow and prevents any smouldering.
With the kindling burning brightly, your fire is now well on its way to becoming a roaring success.
Blowing, Bellows and Extra Air Supply
When lighting a fire, the introduction of extra air can work wonders for getting it going. Whether you’re blowing gently on the flames or using a set of bellows, the principle is the same: you’re increasing the oxygen supply to the fire, which boosts combustion and generates more heat.
Why Blowing on a Fire Works
Fires need three essential ingredients: fuel, heat, and oxygen. By blowing on the fire, you’re feeding it with additional oxygen, which encourages the flames to burn brighter and hotter. This works especially well when:
- The fire is struggling to catch.
- The kindling is glowing but not yet producing strong flames.
- A log is starting to smoulder but hasn’t fully caught alight.
The gentle airflow helps ignite unburned gases and raises the temperature of the combustion zone, allowing the fire to grow stronger.
When to Blow on the Fire
Blowing on a fire is most effective in the early stages, when the flames are small and delicate. Focus your breath at the base of the fire, where the kindling and firelighters are burning, as this is where the most heat and oxygen are needed. Be cautious not to blow too hard, as this can extinguish small flames or scatter the kindling. Slow, steady breaths are best.
What Are Bellows?
Bellows are a traditional tool used to direct a steady stream of air into a fire. They work by compressing air and pushing it through a nozzle, allowing you to deliver enough oxygen precisely where it’s needed.
Are Bellows Useful?
Absolutely! Bellows are particularly helpful for:
- Reaching deep into a stove or fireplace to target the fire’s core.
- Providing consistent airflow without the effort of blowing manually.
- Avoiding getting too close to the flames, which can be uncomfortable or unsafe.
Bellows are especially handy if you’re lighting fires frequently, as they make the process easier and more efficient. They’re also a great way to revive a fire that’s starting to die down, helping to reignite logs or embers with minimal fuss. Here is a diagram of a set of bellows:

Step 4 – Adding Fuel and Building Temperature
Once your kindling is burning brightly, it’s time to add fuel to your wood burning stove or multi fuel stove to build up the temperature and create a steady bed of embers. This stage is crucial for maintaining the fire going and achieving maximum efficiency, but it’s also the trickiest part of the process. Adding too much fuel at once can smother the flames, while using the wrong type of wood can hinder ignition.
To get the best heat output, begin by adding small logs to the fire. Gradually work your way up to larger logs as the temperature increases and the embers start to form. Small logs ignite more easily, helping to sustain the heat needed for a stable fire.
Adding too many logs at once can lower the temperature in the combustion chamber, making it harder to keep the fire going. Instead, add more logs one or two at a time, ensuring they catch fire fully before adding additional fuel.
Choosing the Right Wood
The type of wood you use can make or break this stage. Logs with a lower moisture content, such as kiln-dried wood, are ideal because they burn hotter and more efficiently. Moisture content is a critical factor—wet wood produces steam, which cools the fire and reduces efficiency.
Start with softer woods like Birch or Alder: These ignite quickly and burn hot, making them perfect for building the fire’s temperature.
Avoid adding too much hardwood like Oak at the start: Hardwood is dense and harder to ignite because it requires higher temperatures to start burning. Once the fire is well-established and the stove is hot, hardwood can provide a long-lasting, high-temperature burn, but it’s best reserved for later.
Tips for Maximum Efficiency
Keep the air vents fully open while adding logs to ensure a strong oxygen supply. Arrange the logs in a criss-cross pattern to allow for good airflow around the wood. Avoid piling logs too high or too close to the stove’s glass, as this can block airflow and reduce heat output.
By adding fuel gradually and choosing the right type of wood, you’ll build the temperature steadily, creating a glowing bed of embers. This is the foundation for a fire that burns efficiently and keeps your wood burning stove or multi fuel stove performing at its best.


